
Welcome to my blog and our next Hop. This theme is Fractured Cards or Shutter Cards

Follow along with us and see what my other crafty friends have created for this Hop.
When we were given this theme, I had no idea what a shutter card was, so I did a bit of research and came across some very lovely cards. My first thought was "Holy Cow - that looks like some very intricate measuring and cutting to make this work." I was scared. But sit tight, and follow along and you will soon see that this is one of the easiest cards you will make. The hardest bit was stamping straight (I'm still to master that area). At the end of the day though, it doesn't matter, because it will be uniquely yours, and whoever you send it too will love it for the effort you have taken to make it.

This card doesn't require a lot of stock so its really simple to make lots if you need a supply of cards for "just in case" occassions.
I have used Blueberry Bushell as the base - I've just cut a piece of A4 cardstock in half lengthwise at 10.5cm and scored at 15.9cm
I have used a piece of the Masterfully Made DSP - this would have to be one of my most favourite paper packs because of the bright happy colours. I've cut this to 14.9 x 9.5 cm
I have used the Basic White and cut a square 5 x 5 cm.
Lastly, Ive cut some strips of Blueberry Bushell 1/4 " wide (I'm glad our trimmer works for imperial and metric becuse I always work in inches and cm combined).

I've taken a sentiment from the Dainty Delight stamp set and stamped in Momento Black ink.

I've glued the sentiment in place on an angle so it sits like a diamond using our Multipurpose Glue. Easy so far right? Now for the tricky bit (actually its not tricky at all - it just looks like it at the end).


Now take the 1/4" strips and one at a time, glue them along the side of the sentiment. I started the first strip right on the edge of the white square, then laid the second one down butted up against the first piece. Continue until you have a thin strip around each edge of the sentiment.

Now, turn the card over and use your paper snips and carefully cut off the excess of the strips so they end flush against the edge of the paper.
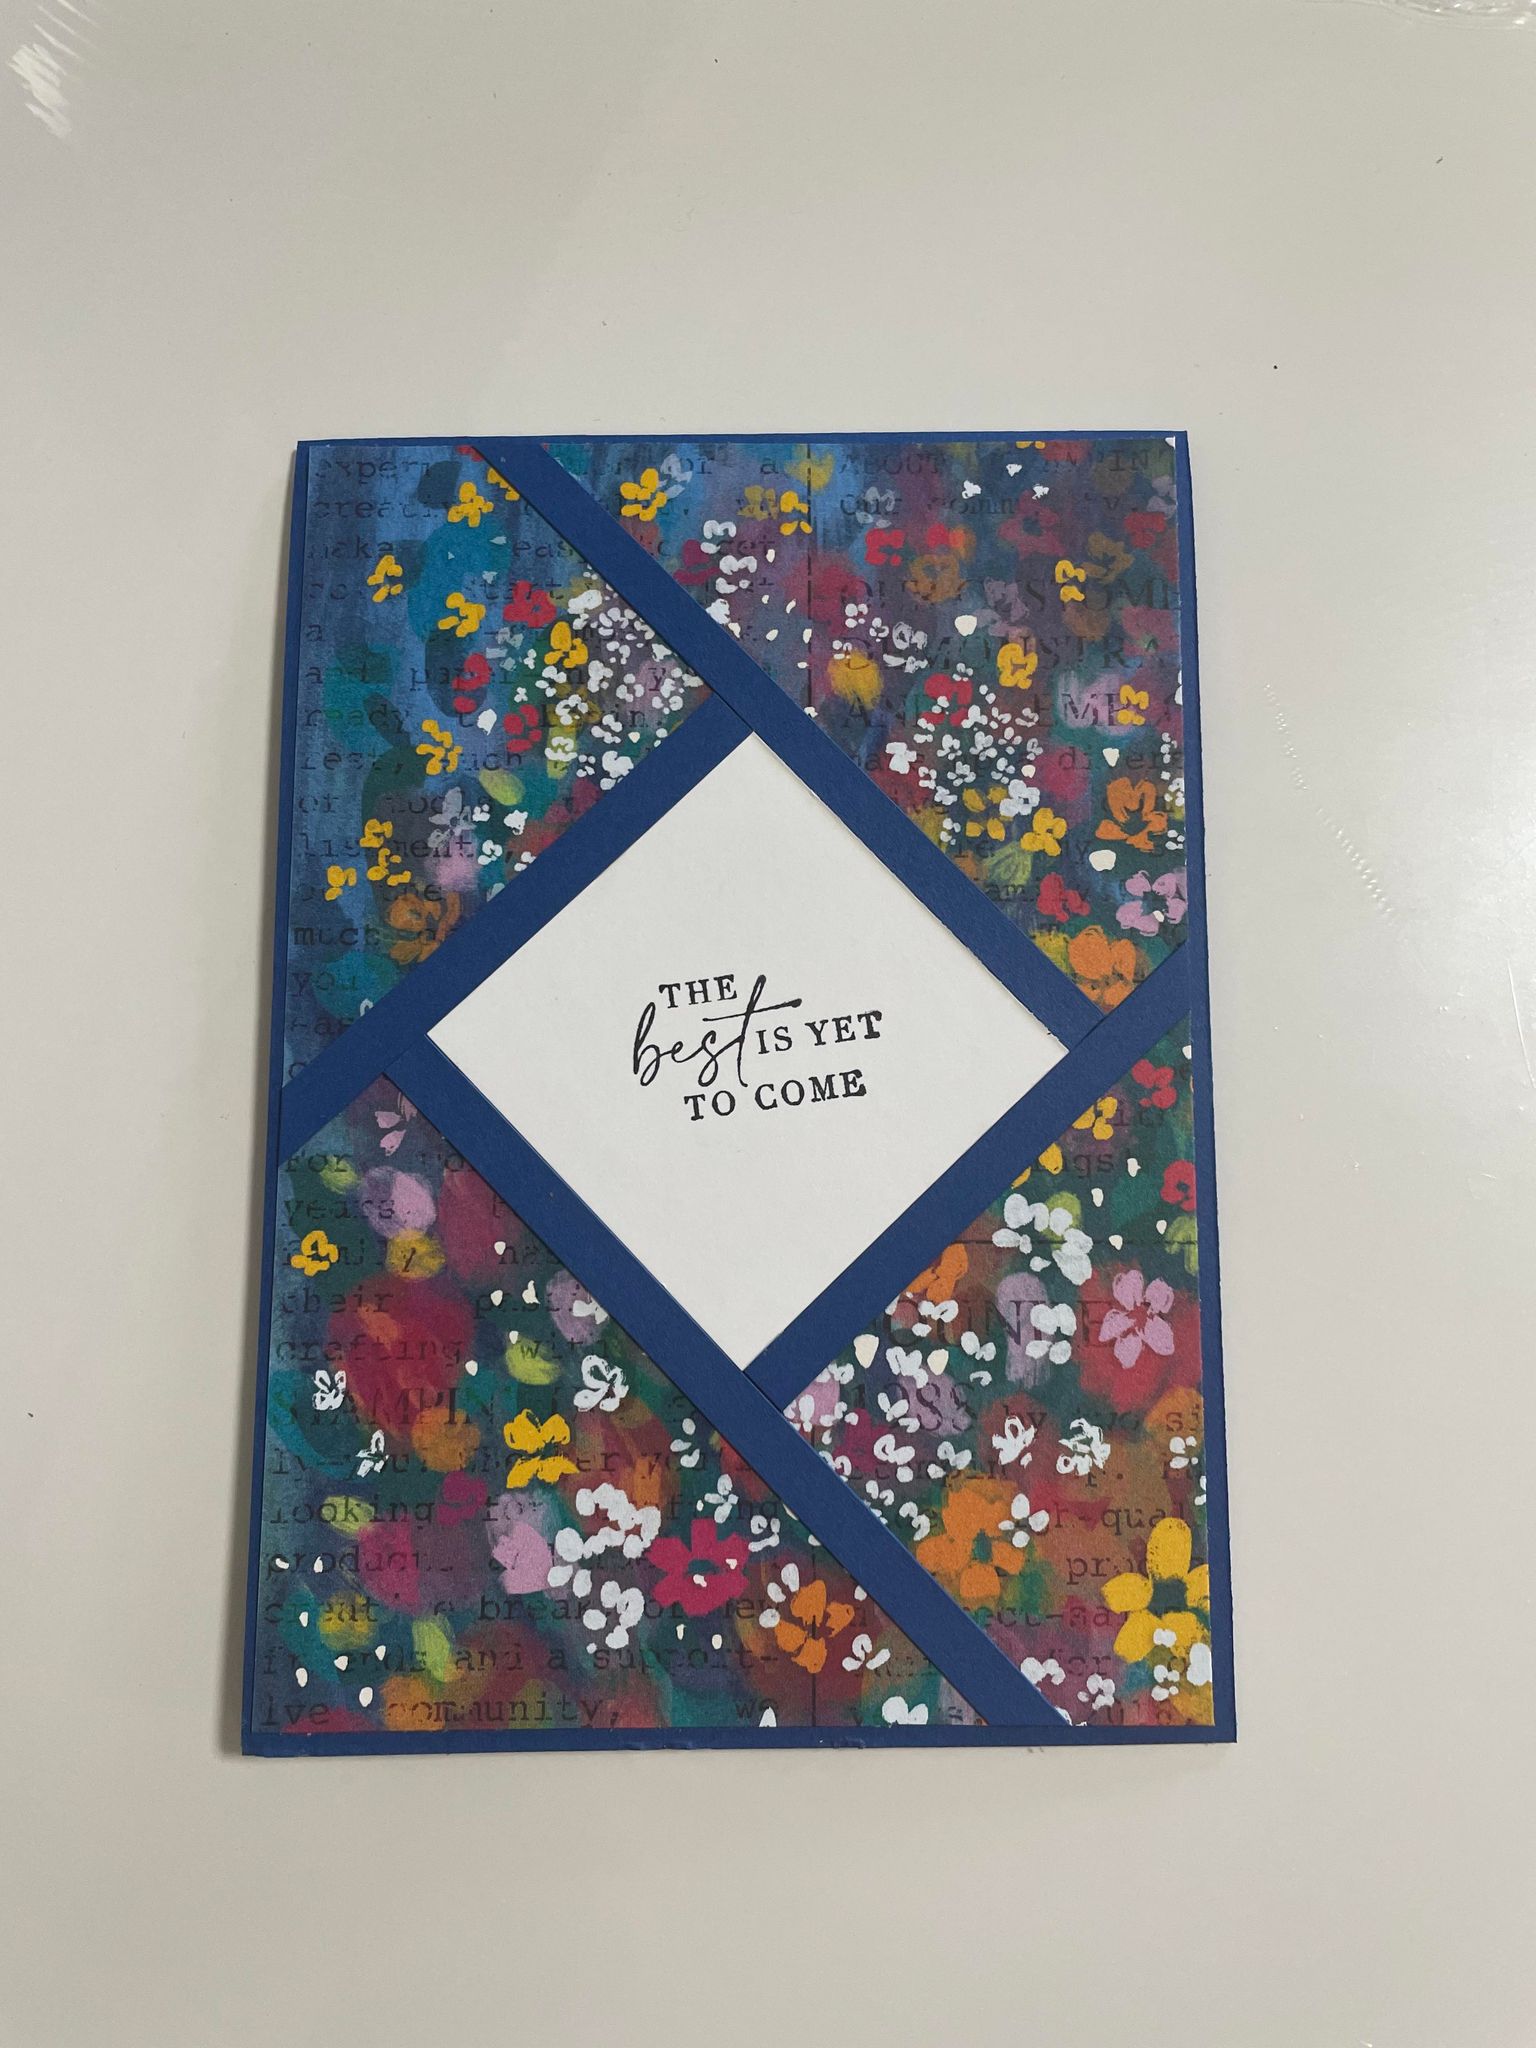
Adhere the card front to the card base. Its as simple as that.

Then you can embellish it how ever you like. I've just added a couple of Rustic Metallic Adhesive Dots, but you could add ribbon, sequins, whatever you have in your stash.
Hop on over to see what my friends have been creating. I hope I have inspired you to give a shutter card a go. They really are easy and super fun to make.
Product List - you can shop directly from my store.


 Designer Series Paper")
")


If you live in Australia and do not have a Stampin’ Up! demonstrator, please contact me at
creativejunction@bigpond.com
I would love to help you with your creative discoveries.
Reach out if you would like a copy of our new catalogue - products are available now while stocks last.
creativejunction@bigpond.com
I would love to help you with your creative discoveries.
Reach out if you would like a copy of our new catalogue - products are available now while stocks last.
Cheers
Deb


