Sunday, February 6, 2022

Monochromatic Card - Stamping With Friends Blog Hop


Welcome back for our next fun Stamping with Friends challenge.  
This time, its a monochromatic card.  

I jumped into this one thinking it was going to be really easy.  I was planning on a simple black and white card, maybe with a pop of red, but wasn't really sure if that was considered "monochromatic".  So I jumped online to do a bit of research first before I started and discovered that  "Monochromatic colours are all the colours, tones, tints and shades of a single hue".  So, back to the drawing board for me to decide on a different angle for this one.  And here is what I came up with....I hope you like it.


I have chosen a purple theme, so I have used Gorgeous Grape, Fresh Freesia and Basic White for my cardstock.  I've added touches of Highland Heather as well. I have worked with masks and Embossing Paste, The Dragonfly Garden Bundle and the Elegant Tags punch. So let's go....
Details and sizes are listed below. 


Firstly, I used a mask from the Butterflies & Flowers Layering Decorative Mask set. Set the mask template over a piece of basic white cardstock and tape it in place to hold it steady. I have taken my spatula and removed enough embossing paste from the jar (a good heaped tablespoon) and placed it on a work surface for mixing (I used a large stamping block but you could use a paper plate, a piece of glad wrap, anything that will allow a smooth mix).  Next I dropped a few drops of Highland Heather Ink into the paste and mixed it all with the spatula. Once its mixed to the colour you want, apply the paste to the cardstock over the template.  Be sure you have a nice thick layer and it is all even.  Once complete, carefully remove the template and allow the paste to dry.  Clean up you tools quickly with warm soapy water so the paste doesn't set to it all.


Once the paste has dried, I have lightly brushed over the paste with Wink of Stella for a bit of extra sparkle and pizzazz.


Use your favourite adhesive to attach the embossed piece to the Basic White matt. 


Add a strip of Highland Heather ribbon to the white cardstock BEFORE attaching it to the Fresh Freesia matt.  This then all attaches to the Gorgeous Grape base.


I have used Gorgeous Grape Ink pad to stamp the dragonfly on Fresh Freesia Shimmer Vellum.  Allow it to dry a little longer than normal stamping to prevent smudging, then cut it out with the punch.  I have used mini glue dots to adhere the dragonflies.


I stamped the sentiment on the Elegant Tag and added a few little dragonflies from the set. (These were stamped off twice before stamping on the tag and I felt they were still too dark so have softened them a little using the Blender Pens.  If I was to do this again, I would use a lighter ink pad for the little dragonflies).  I've popped on a few Pastel Pearls to finish of the card.

Card measurements:
Gorgeous Grape Cardstock: – 21 x 14.2 cm scored at 10.5 cm
Fresh Freesia Matt: 14 x 10 cm 
Basic White Matt: 13.5 x 9.5 cm
Basic White for embossing:  13 x 6 cm
Basic White Scrap for tag


I hope I inspired you to try a new technique for your next card. To continue along the blog hop, click on the image below to see what my new friend Mickey Moore has made today.


Product List

Sunday, January 23, 2022

Valentine Card - Stamping With Friends Blog Hop


 Hi and welcome to my blog. This is my second "Blog Hop".  I'm still learning but having great fun along the way. I will be hopping with some awesome new friends from the "Stamping with Friends" blog hop group.  For this hop our theme is Valentine's Day.

I'm not a big Valentine's Day fan, but I totally understand the sentiment.  Maybe its just because I've been with my valentine for over 20 years and every day is great.  

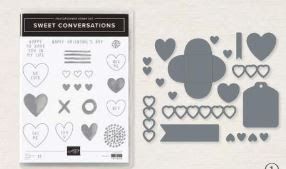
I was a little time poor for this hop so I wanted to use products that would be quick and simple to create a card.  I chose to use the Abstract Beauty Cards and Envelopes and the Abstract Beauty Ephemera Pack along with the Sweet conversations Bundle. This card is so bright and colourful, it took less than an hour (honestly if I was better prepared it could have taken 10 mins) 


I decided to create a simple card for this blog hop, using basic tools and pre-prepared cards and embellishments.  I hope you enjoy and it inspires you to get creative.  😊😊😊

And.....here we go.......what do you think?  Certainly not the traditional style Valentine Card but I love the bright colours.  Makes you feel all sun shiny and warm doesn't it? So quick, so simple, so cute and easy for anyone to do.  And what a perfect way to let a someone know you care. 


The card is from the Abstract Beauty Cards and Envelopes Pack which has 10 beautiful card bases and matching envelopes - all or stunning colour combinations and ready for you to simply stamp and send.  No need for measuring or cutting, its all done for you already.

For the enhancements on this card I just chose the little envelope die and the strip of hearts from the Sweet Heart Dies set, used a couple of pieces of cardstock that matched the colours in the card - I used Mango Melody, Polished Pink and Basic White.  


I started by simply choosing the white hearts and used multipurpose glue to adhere the strip in place.  I only used the tiniest amount of glue at the top and bottom of each heart and where two joined.  The strip wasn't quite long enough so I cut a second strip and adjusted it to fit.


I positioned to t2o little envelopes to help break the background of the card and stamped using the Sweet Conversations Stamp Set and Tuxedo Black ink.


I've added the colourful heart from the Abstract Beauty Ephemera Pack and small hearts popped out from the centre of the dies.  Just spread them around to help break up the strong background and create some interest.  I wanted mine to look like they were popping out of the envelopes like tiny balloons.


Add a bit of bling and its done.


And thats all there is to it.  No cutting. No measuring. No scoring.  Simple.


I hope I inspired you to make a simple card.  Now, lets "hop" along and see what our next creative lady, Donna Lester, has for you. Just click on the Next button below to visit her blog or use the Roll Call List to find your say around.  We would all love if you would take a moment to comment and share what you like about our projects.  I hope you find something along the way that you just have to have a go at.  


Product List

Sunday, January 9, 2022

Sketch Challenge - Stamping With Friends Blog Hop


 Hi and welcome to my blog. This is a little bit exciting for me because today I am participating in a "Blog Hop".  A Blog Hop is a group of SU Demonstrators who have created some beautiful projects to share and we share each others creations. I will be hopping with some awesome new friends from the "Stamping with Friends" blog hop group.  This hop, we are working with a Sketch Challenge.

A Sketch Challenge is when we are given a design to work with and have free choice of which products we use.  I can't wait to see all the combinations.

I have chosen to create a card using the new Hello Ladybug Bundle which has just been released.  How cute are they?  I just love Lady Bugs - and you know - if one lands on you, it brings good luck.


I decided to make a simple card for this blog hop, then thought I'd try something a little more detailed to stretch myself a little and try something new.  I hope you enjoy and they inspire you to get creative.  😊😊😊

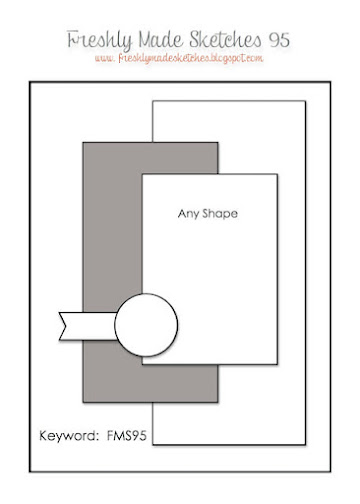
My cared is inspired by a sketch by Freshly Made Sketches.
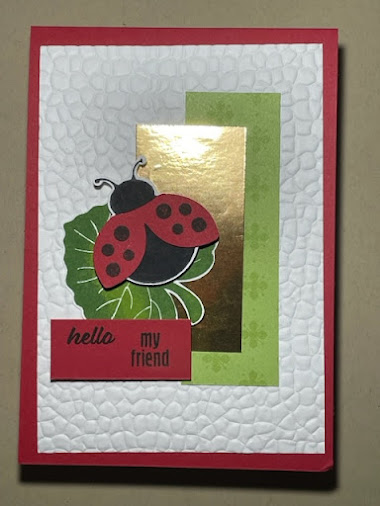
And.....here we go.......what do you think?  So quick, so simple, so cute and easy for anyone to do.  And what a delightful way to let a friend know you are thinking about them. 


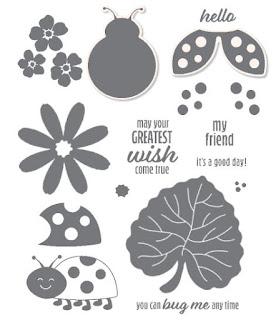
The card base is Real Red card stock. I have a Basic White card stock panel embossed with the Hammered Metal Embossing Folder.   All other elements are scraps of Granny Apple Green Designer Series Paper (DSP) from the 6x6" Brights, a piece of Gold Foil Paper, Real Red and Basic White..  Its a great little design to use up left over bits. The Lady Bug, Leaf and Sentiment are all from the Hello Lady Bug stamp set

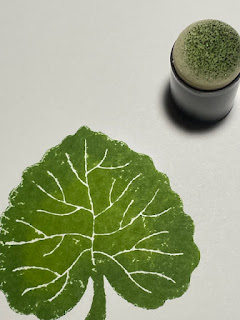
For the Leaf – I inked the leaf all over using Granny Apple Green stamp pad, and used the sponge dauber and Garden Green to darken the edges and the stem before stamping on to the white cardstock.  I then cut this out using our awesome Paper Snips Scissors. 


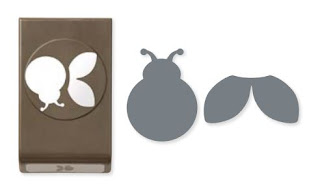
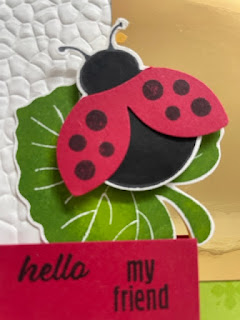
For the Lady Bug – I stamped the body of the bug onto the white cardstock with Memento Tuxedo Black and cut it our with the Lady Bug Punch.  I cut the wings from a scrap of Real Red cardstock and stamped the dots on using the Tuxedo Black ink.  Then I used the Multi Purpose Liquid Glue to attach the wings to the bug.  I used some Dimensionals to adhere the Lady Bug to the Leaf.


Card measurements:
Real Red Cardstock: – 21 x 14.2 cm scored at 10.5 cm
Basic White panel: 14 x 9.5 cm plus enough for the leaf and the ladybug
Gold Foil Paper: 4 x 7.5 cm
DSP – 10 x 3.5cm

For something a little more difficult, I replaced the Granny Apple Green with a shaker box.  I used the Stitched Rectangle dies and cut a piece from the Basic White Cardstock.  I stuck the cut out in place on the Real Red card then built the shaker box up from there using Foam Adhesive Strips.  I chose some matching coloured sequins from current packs available in our catalogues and topped it with a small piece of the Window Sheet.  Then I attached the Basic White panel using Dimensionals and  Tear and Tape.  For the sentiment, I used Versamark Ink and the Gold Embossing Powder and set it using the Heat Tool


I hope I inspired you to make a simple card. To continue along the blog hop, click on the image below to see what my new friend Caron bailey has made today.


Sketch Challenge Blog Hop Roll Call
Roll Call
Linda Moore
Rachael Merrick
Deborah Schultz
Caron Bailey
Lorraine Tierney
Donna Lester
Karen Egan
Robbie Susan Chandler
Nicole Mahler
Tricia Butts
Diane Evans
Victoria Littlewood
Kelly Place Taranto
Melva Peters
Helen Jennings
Tina Hewitt
Candi Suriana Grace
Mickey Moore

If you live in Australia and don’t have a Stampin’ Up! Demonstrator, please contact me. I'd be happy to help you along your creative journey.
Please take a moment to leave a comment, I truly appreciate it.
Until next time,
Deb


Product List

Wiper Technique

I've had a bit of a break from blogging while I was recovering from a bug, but I'm back today with the Stampin with Friends Crew - c...